

do's and don'ts on how to paint a dresser
Hello there! How was your Halloween? Did you dress up this year? I did not -- I have been so busy remodeling and coming up with new projects, I didn't have the energy to do the extra things like Halloween, which I regret. But also, I'm kind of proud of myself for not pushing myself beyond my capabilities. I posted this on the Saturday before Halloween:
Besides being motivated and not procrastinating, I also believe it is important to give yourself a break every once in a while. And that's probably why I'm sick right now, too. I've just pushed myself to the limit and I know my body needed a break. It has a funny way of reminding me when I need to slow down -- by making it physically impossible to do anything else even though I REALLY REALLY want to!
But you're not here for that. You're here to learn about how to paint your very own gorgeous dresser!!
A few disclaimers before you proceed:
I do not recommend spray painting indoors. I could not move this dresser after they assembled it in my house, and I only decided to redo it a year after it was installed.
If you do spray-paint, please do so in a well-ventilated space outdoors. The paint fumes are horrendous and the paint goes EVERYWHERE.
So proceed with caution and DO NOT SAY I DID NOT WARN YOU.
Step 1: Buy a plain dresser
Or any piece of furniture that doesn't have any adornments. And notice I don't even say "plain CHEAP dresser." I have bought vintage, used dressers before. They might look cool but they suck. The drawers stick, they are too small, etc. So I say buy a nice dresser that works well and fits your clothes. I also say pick a plain dresser because then it is easier to prep and paint.
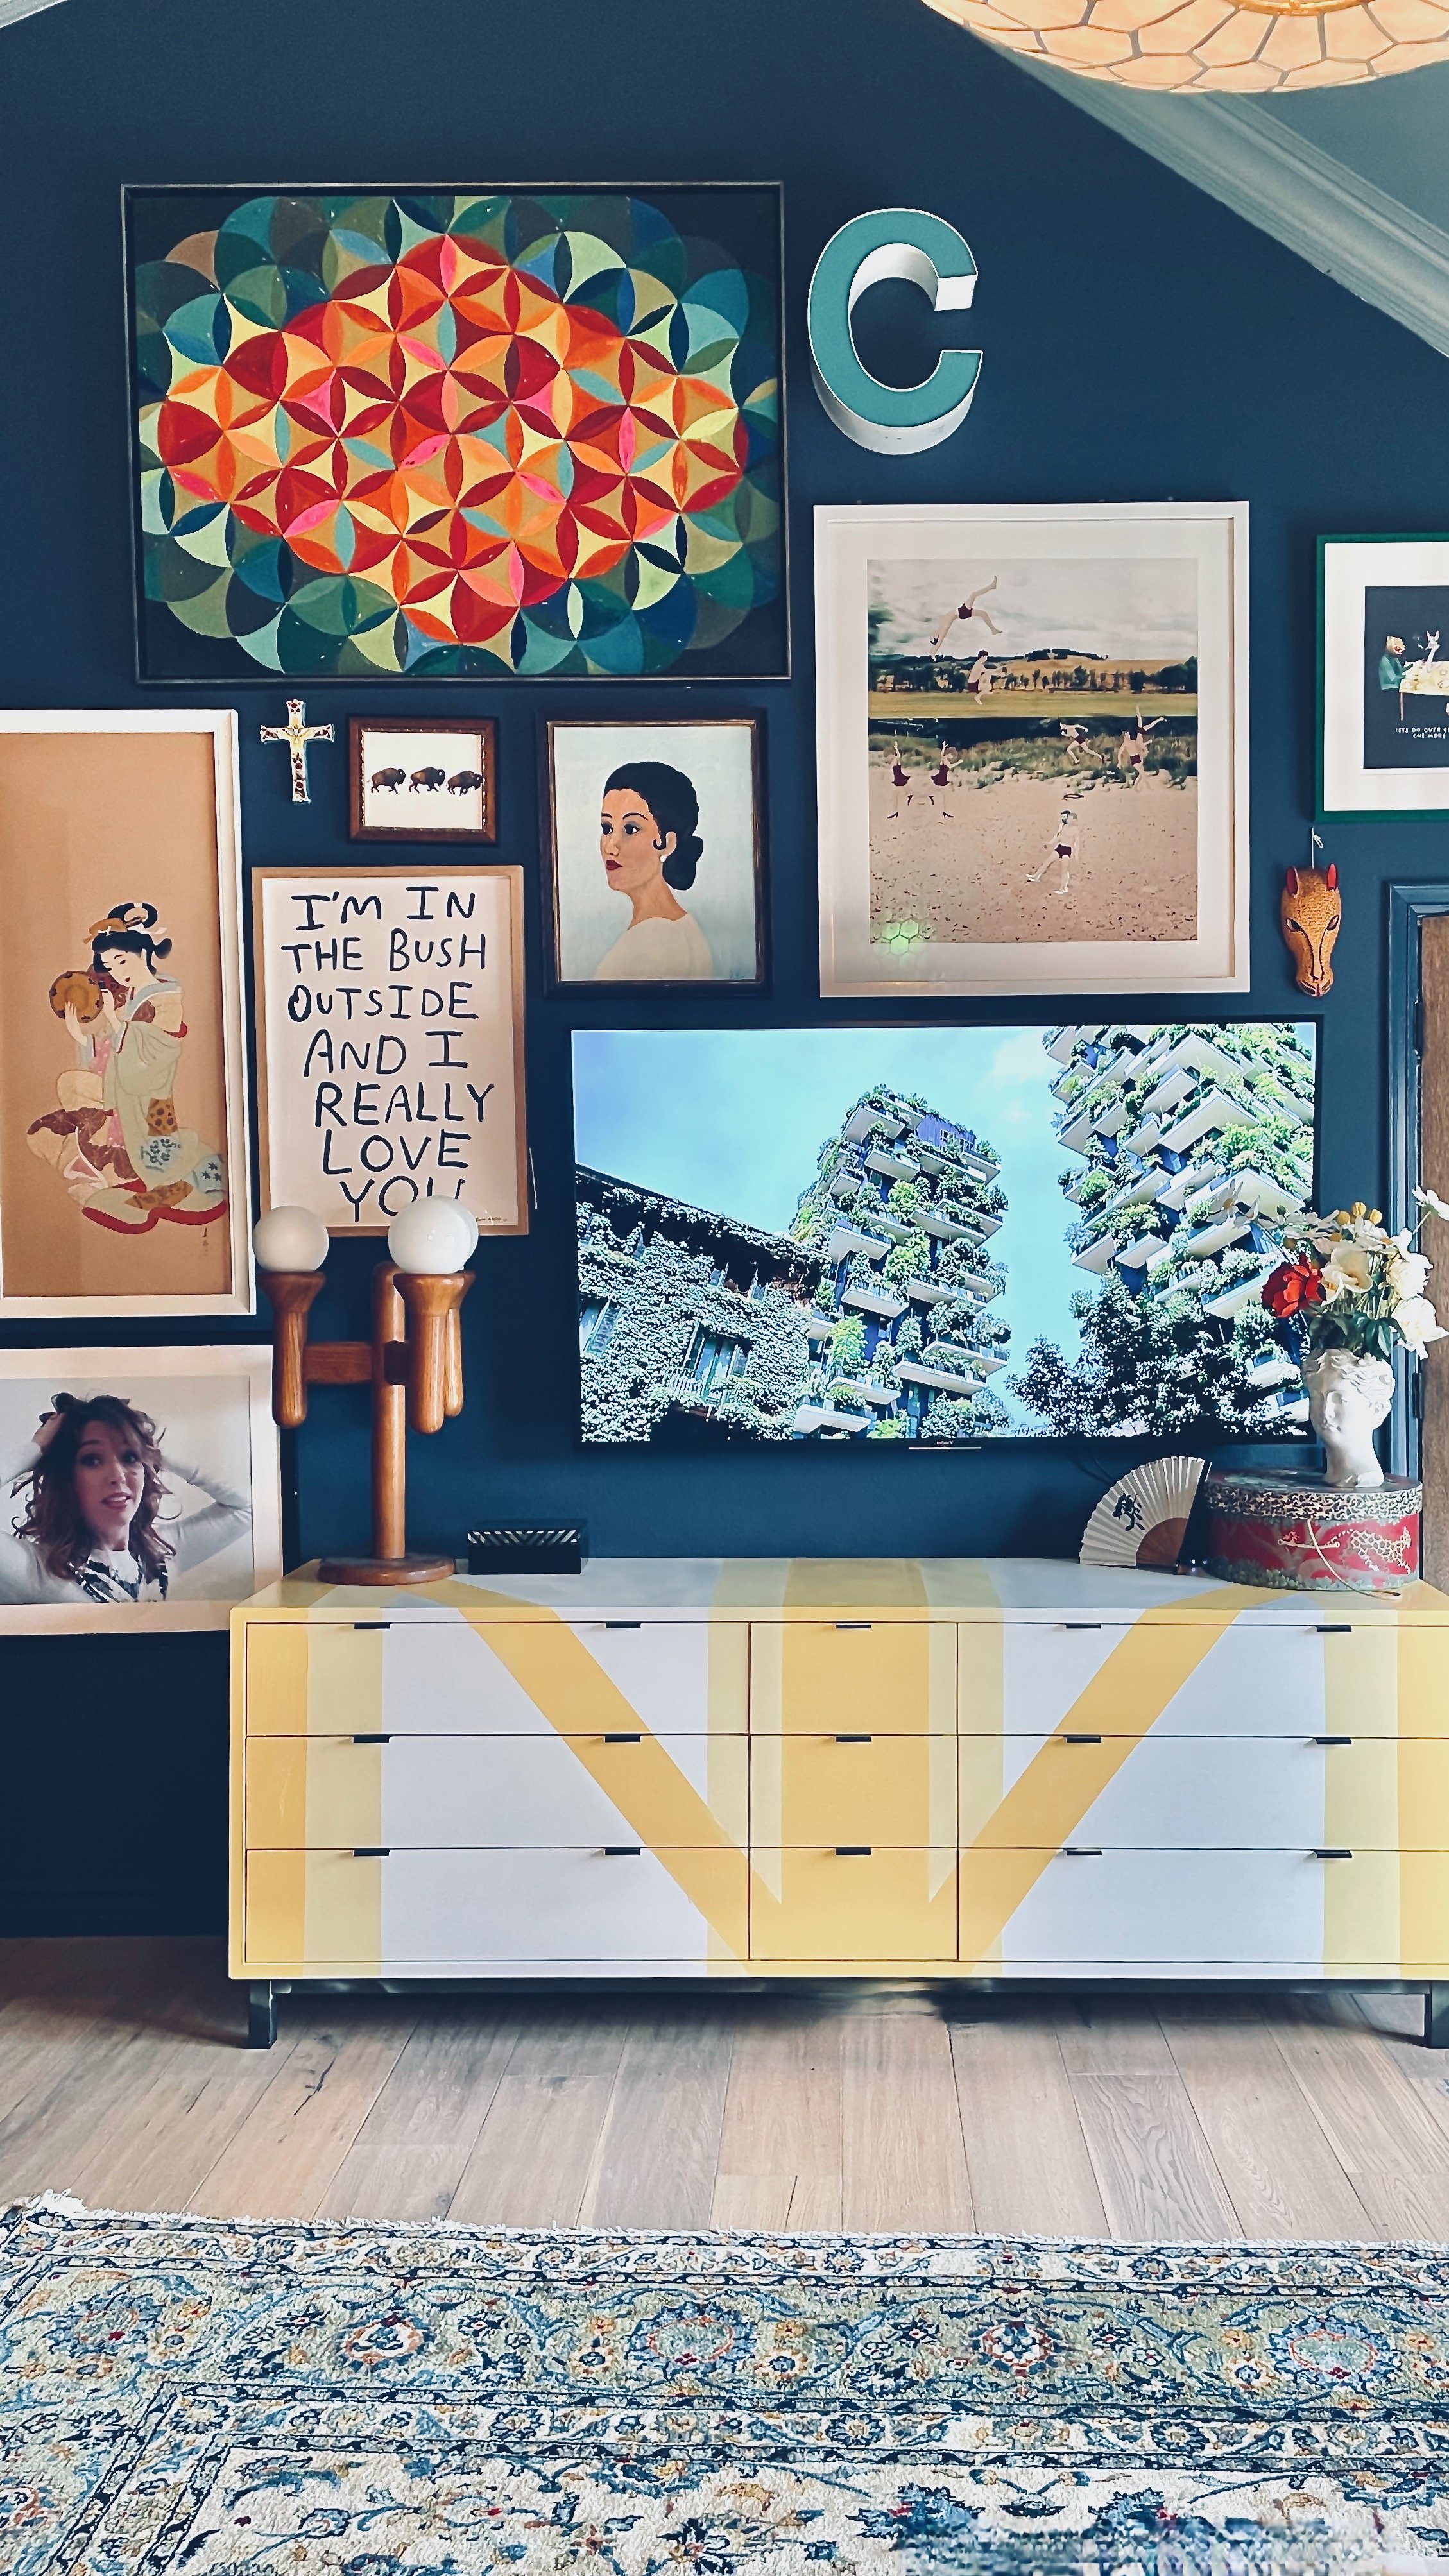
For this project, I chose the Room&Board Copenhagen 84" dresser. It has nice streamlined edges, not too many adornments and I like the handles. It comes in many different colors, but I chose white so that I could get this affect.

The price has now gone up to $2400 (🤬) but when I bought it, it was $1800. Inflation is REAL, people!!!
I chose the white MDF option with the black legs and hardware. That is the simplest and cleanest design choice, but you can also do any color and it will still turn out great!!
You can also opt for a cheaper IKEA dresser, but again I stress - make sure you get something that will last and is functional. You can always repaint or cover up. But you can't make a dresser not suck if it was made cheaply.
step 2: choose your design and colors
I don't know if you know this, but I am not an artist per se. Shhhhh... it's my little secret. I do consider myself more of a diorama maker, only life-size, but I use found objects and reinvent them in the space. But when it comes to designing my own graphics, I can do the basics. Or maybe I'm selling myself short since I have always been very good at art and making things. So, maybe a little bit of both.
But bottom line, I am not a DIY'er. If it requires any sort of skill, I leave that to the experts. On this one, though, I really had to figure it out on my own. And that's good news for you experienced DIYers reading this -- this will be a piece of cake!
I used this artwork for inspiration for the color:

I loved the ochre and the green, but I felt the yellow would be stronger and pop against the blue. Good god, I just said "pop". Forgive me.
So then next I had to choose a design. I liked the union jack British flag but wanted to do my own version of it. I also liked this wallpaper and wanted to do a version of it:

So cool right? And also very, very expensive. I'm ok with expensive, but I personally would not want to wallpaper furniture I use every day. And if I were to wallpaper, I would use removable wallpaper. And if I were to use removable wallpaper, I would have to find something really special. And we all know there are not a lot of SPECIAL removable wallpapers out there. No offense to removable wallpapers. I just said wallpaper a lot.
But the design is pretty simple and what I really want is the lines and the effect. It looks happy, modern, vintage, masculine, edgy. Plus I want a big graphic moment vs. lots of little lines. That's the beauty of making your own design -- you can decide the colors, the shapes and the SCALE.
Step 3: purchase prep items and paint
Me being a novice, I asked my handyman what I needed to paint a dresser made of MDF and painted white.
According to him, this is what you need:
masking tape
lots of plastic to cover up areas you don't want covered in spray paint
sand paper
paint scraper
furniture spray paint - 6 or 7 cans
measuring stick (vs. tape)
I love Lowe's -- and I swear this is not a paid advertorial for Lowe's. But Lowe's has the best selection of spray paint out there. For this project, you will need a lot of spray paint.
As for colors, I wanted to emulate the wallpaper so I chose two versions of yellow. The first is an orange-ier shade and then the second is a whiter more pastel tint of yellow.
Step 4: prep
As you can see from the video above, I prepped as I went and not very well. I'm not a very careful person by nature, hence the reason I don't DIY a lot. But I did prep.
First, I taped off and covered all the areas I didn't want covered in spray paint. I then taped off my design from left to right. I used a measuring stick vs. tape so that I could use it to mark guide lines just in case I was off. I knew I wanted the design to create two diagonal lines that met in the middle, so there was a little math involved but not too much. That's another thing I am bad at -- math. So DIY is a challenging experience for me.
I left the area meant for paint exposed so that I could sand just that part. I'm not going to lie -- I forgot to do that in some places, and I can kinda tell. But that's me. Also remember to wipe of the excess sanded dust off before painting with a damp cloth.
Fun little painting tip: use a paint scraper or similar straight edge flat thing to press the tape down. This eliminates leakage and makes the lines extra clean. That is the ONE thing I have really learned works with any painting project.
step 5: paint
I've spray painted before, but I'm not a spray paint aficionado. I did it mostly for fun and without much need for precision. And this is a precision job. Again, NOT MY FORTE. It is a miracle it turned out as well as it did. Seriously. It should have ended up with me paying someone to paint it back to its original color, but here we are.
The first line, I got too close to the wood and it started to bubble. I adjusted my distance and then figured out the right distance to wood and spray paint coverage ratio. The problem is that if you're too far, all the paint goes everywhere and you have to use a lot of it to cover the area. And then too close, you have the bubbling problem. The correct distance is about 8". Don't hold me to that though.
I first did the more orange-y yellow lines since they were the more prominent design. The lighter yellow will be second banana (🤪) and needs to be painted second.
I didn't add a top coat (should I????) so after painting, I was done.
summary
I didn't spend a ton of money redoing this dresser but it has a huge impact. And bonus, it was relatively easy. 6 hours later and a few back massages, and it was done! I will never do it again so take a good look. I will stick to IKEA chairs and maybe a few tufted headboards.